Tampilkan postingan dengan label fine art. Tampilkan semua postingan

Selasa, 23 Juli 2013

Messy Frames Tutorial

So....... usually I'm painting stuff to put in frames, but this time I played with painting the frames themselves!

This is such a simple and quick project.  Only two steps and you're done!

Materials:
picture frames- preferably white ones
acrylic craft paints
paint brush
water

Step 1:  Paint stripes or dots or whatever other design you like on your frames in multiple colors.  Let dry for a few minutes.  The more you let the paint dry, the harder it will be to rub back in the next step.

Step 2:  Holding the painted frame under running water in the sink, gently rub off some of the paint you just applied.  It's up to you how much paint you want to rub off.   Lay out to dry.

You're all done!  See.... I told you this a was a quick one!  All you have left to do is find the right stuff to fill your frames with.  I went for some old watercolors from my "mess-ups" pile.  Now I have some bright and cheery decor for my art room :)

Rabu, 17 Juli 2013

The Influence of Summer

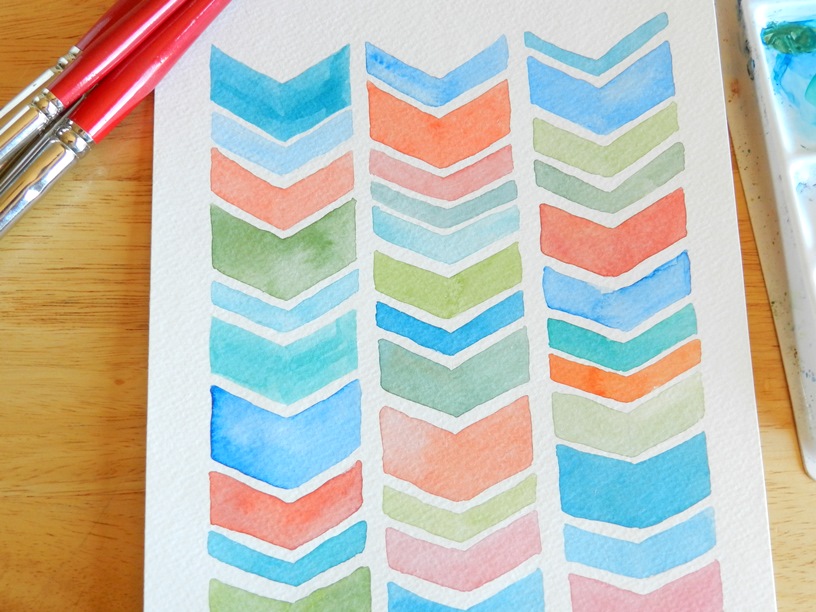
My latest watercolor illustrations........

I started out with the Chevron design in mind, but by the time I finished that, I had several other ideas.   So I kept painting..... and painting :)  I think the fact that it's summer time had a huge influence on these.  I can't keep myself away from bright colors!  

Selasa, 02 Juli 2013

Junk Mail Art Tutorial


Ever wondered what you could possible do with all the piles of junk mail you get every week? .... besides throwing it away or sending it to the recycling bin, I mean.  I always notice the bright colors and think... I should make something with this.  

Well, I finally came up with something fun..... some Junk Mail Art!

Here's a little tutorial to get you started:

Materials:
  • Picture of a feather- You can download my feather drawing to use.
  • 8 1/2 x 11 sheet of printer paper or cardstock- to print the feather picture onto and glue the junk mail strips to.
  • 8 x 10 sheet of watercolor paper or cardstock
  • Junk mail
  • paper cutter
  • Rubber Cement or Glue Stick
  • scissors


Step 1.  Print the FEATHER PICTURE onto a sheet of computer paper or card stock.
Step 2.  With a paper cutter, cut long strips of junk mail.  Cut them long enough to cover the computer paper diagonally.


Step 3:  Glue the junk mail strips diagonally on the backside of the computer paper - make sure the feather picture is face down for this.  Cover the entire page.

 Step 4:  Trim the edges of your paper with a paper cutter.  Since the final size of the piece is 8x10 inches, trim the length to 10 inches here.

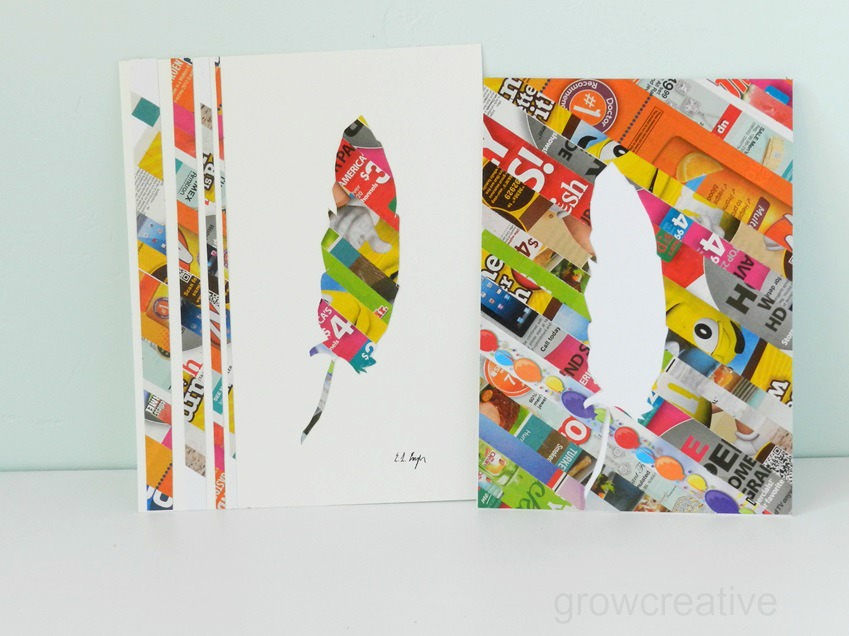
Your sheet should look like this after trimming it down.

Step 5:  Flip your sheet over and on the edge farthest away from the feather picture, slice off a few vertical strips.  I made four, each progressively smaller than the one before.  Make sure not to cut through the feather picture here.  You are going to need it for the next step.

Step 6.  Cut out the feather picture on the backside.  You should now have four junk mail strips and one feather.  Now you are ready to assemble your piece of art!

 Step 7:  Take your 8x10 sheet of watercolor paper and glue the vertical strips down to one side and the feather centered in the remaining space.  Presto!  Junk mail art!


Step 8:  (optional)  You can turn the remaining junk mail sheet into a work of art by gluing it down to another sheet of paper.  Sweet!   Two pieces of art for the price of one!

Kamis, 27 Juni 2013

Blue Goose Feathers

Another feather painting....

I really had fun with this one.... it was so enjoyable to paint!  It's a delicate painting and I'm starting to realize that delicate is part of my style.  It's been hard for me to recognize my own painting style, but I think I'm starting to see it now :)

You can also see this painting in my shop  HERE.

Kamis, 20 Juni 2013

Little Blue Bike

It's almost technically summer!  It's the perfect time to go for a bike ride......or to decorate your house with some bicycle art if you don't actually own a bike.  I'm in the boat of owning no such bikes, but hopefully one day.....


This painting makes me wish I had a pretty bike to ride somewhere cool... like the beach.  And then that makes me wish I lived on the beach..... so ya, I'll just keep on dreamin!

Rabu, 12 Juni 2013

My Little Geraniums


I've already written about one of my favorite flowers (geraniums), but it isn't enough for me to just look at them.... I had to paint them too!

I love how this painting looks in this little white frame! I may have to hang it in my art room for a while, at least until it sells.  It's up for sale in my Etsy Shop!
Selasa, 11 Juni 2013

Thrifted Breakfast Tray Makeover


Are you one of those people that love having breakfast in bed?  I am, for sure! 

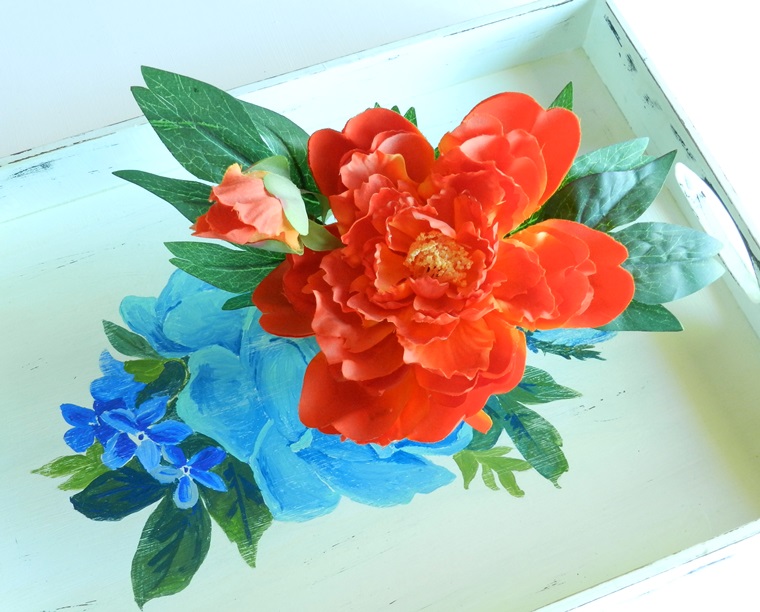
 I had been hunting for a breakfast tray for just such a reason, when I found this one at the thrift store (sorry I didn't take a before photo).  It was brown with some sad looking patterned paper modge-podged to the bottom.  I had to rescue it and claim it for my own.... and it only cost $4!


I ripped off the old paper, sanded it, and repainted it with the left-over paint from my art room.  Then I free-handed a flower design in acrylic paints, sanded some paint back,  and finished it off with some polyurethane.  I've already put this to good use for breakfast and my son likes to take it out in the backyard for picnics too!


Rabu, 05 Juni 2013

Elephants on the Brain

I've got elephants on the brain... or uh... on the brush, I mean.  These little watercolors are so fun to make and they have sold really well, so I had to make more!    There must be a lot of nursery decorating going on out there and these are perfect for it :)

You can check out my Tutorial for Stenciled Watercolors if you want to make your own.

And here's a new design.... a little blue bird.  What do you think?  Maybe do this one in different colors?  

Jumat, 31 Mei 2013

Organic Art


I could call this "pressed flower art", but Organic Art sounds better to me......

I used some dried snapdragons, a paper butterfly and a dried leaf butterfly for this piece.  Like my other butterfly art,  I used photo stickers to keep the different pieces in place on watercolor paper.