Tampilkan postingan dengan label Tutorials. Tampilkan semua postingan

Selasa, 23 Juli 2013

Messy Frames Tutorial

So....... usually I'm painting stuff to put in frames, but this time I played with painting the frames themselves!

This is such a simple and quick project.  Only two steps and you're done!

Materials:
picture frames- preferably white ones
acrylic craft paints
paint brush
water

Step 1:  Paint stripes or dots or whatever other design you like on your frames in multiple colors.  Let dry for a few minutes.  The more you let the paint dry, the harder it will be to rub back in the next step.

Step 2:  Holding the painted frame under running water in the sink, gently rub off some of the paint you just applied.  It's up to you how much paint you want to rub off.   Lay out to dry.

You're all done!  See.... I told you this a was a quick one!  All you have left to do is find the right stuff to fill your frames with.  I went for some old watercolors from my "mess-ups" pile.  Now I have some bright and cheery decor for my art room :)

Selasa, 09 Juli 2013

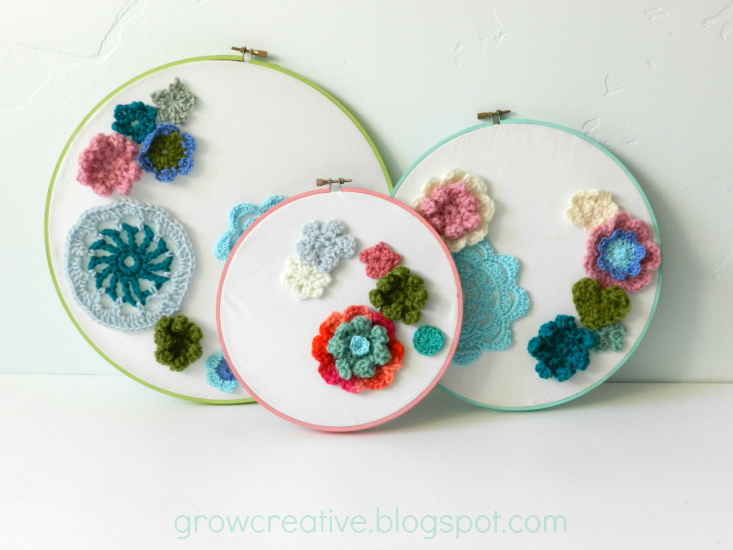
Crochet Flower Embroidery Hoops

I've discovered another use for crochet flowers...

This is such a girly way to decorate and I love it!  I have one room in the house that I can make as girly as I want and that is my art room, so that's where these crochet flower embroidery hoops will stay :)

Check out the tutorial to get started with making your own:

Materials:
Embroidery Hoops
Acrylic Craft Paint
Paint Brush
Fabric- enough to cover your embroidery hoops
Hot Glue Gun with Hot Glue Sticks
Crochet Flowers -I made my flowers from the patterns below:
Seven Petal Crochet Flower
Crochet Sea Pennies
Mini Crochet Flowers
Seven Petal Daisy
9 Petal Summer Flower Motif


Step 1:  Paint the outsides of the outer rings of the embroidery hoops with acrylic craft paint and let dry.

Step 2:  Cut out fabric to fit the embroidery hoops.  Cut the fabric large enough to fit inside the hoops and fold over the undersides.

Step 3:  Place the fabric on the inner hoop and place the outer hoop on top, screwing it tight to hold.  Then hot glue the edges to the inner hoop underneath.

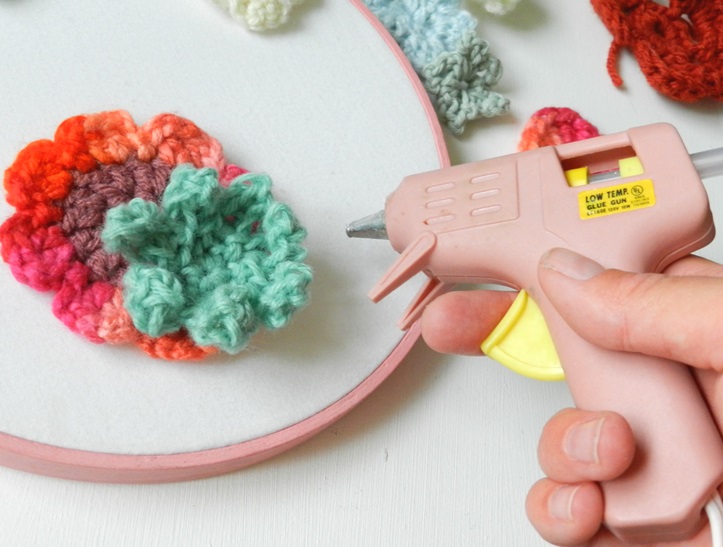
Step 4:  Arrange crochet flowers on the front of the hoops and hot glue them in place. Pretty Simple!

Selasa, 02 Juli 2013

Junk Mail Art Tutorial


Ever wondered what you could possible do with all the piles of junk mail you get every week? .... besides throwing it away or sending it to the recycling bin, I mean.  I always notice the bright colors and think... I should make something with this.  

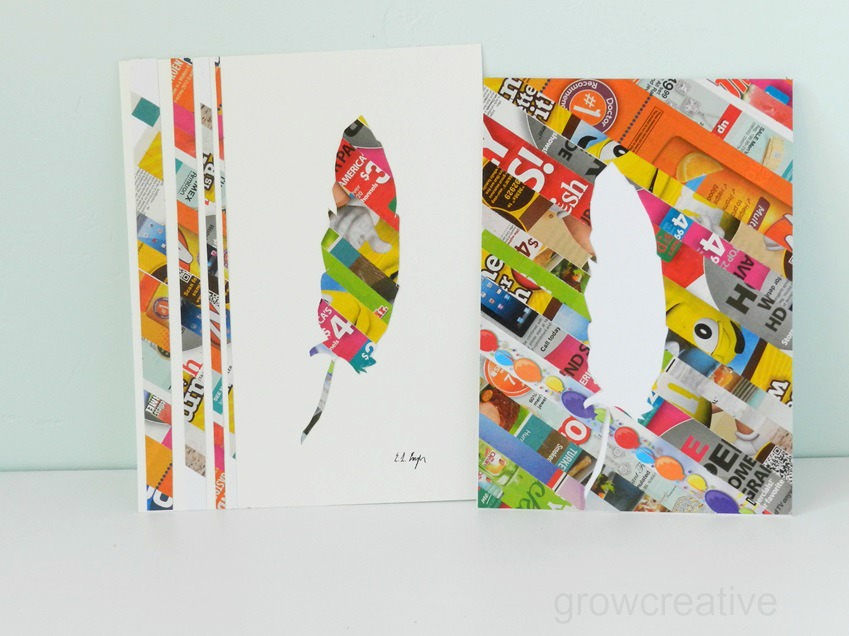
Well, I finally came up with something fun..... some Junk Mail Art!

Here's a little tutorial to get you started:

Materials:
  • Picture of a feather- You can download my feather drawing to use.
  • 8 1/2 x 11 sheet of printer paper or cardstock- to print the feather picture onto and glue the junk mail strips to.
  • 8 x 10 sheet of watercolor paper or cardstock
  • Junk mail
  • paper cutter
  • Rubber Cement or Glue Stick
  • scissors


Step 1.  Print the FEATHER PICTURE onto a sheet of computer paper or card stock.
Step 2.  With a paper cutter, cut long strips of junk mail.  Cut them long enough to cover the computer paper diagonally.


Step 3:  Glue the junk mail strips diagonally on the backside of the computer paper - make sure the feather picture is face down for this.  Cover the entire page.

 Step 4:  Trim the edges of your paper with a paper cutter.  Since the final size of the piece is 8x10 inches, trim the length to 10 inches here.

Your sheet should look like this after trimming it down.

Step 5:  Flip your sheet over and on the edge farthest away from the feather picture, slice off a few vertical strips.  I made four, each progressively smaller than the one before.  Make sure not to cut through the feather picture here.  You are going to need it for the next step.

Step 6.  Cut out the feather picture on the backside.  You should now have four junk mail strips and one feather.  Now you are ready to assemble your piece of art!

 Step 7:  Take your 8x10 sheet of watercolor paper and glue the vertical strips down to one side and the feather centered in the remaining space.  Presto!  Junk mail art!


Step 8:  (optional)  You can turn the remaining junk mail sheet into a work of art by gluing it down to another sheet of paper.  Sweet!   Two pieces of art for the price of one!

Rabu, 19 Juni 2013

Seven Petal Daisy Tutorial

Once you get into making crochet flowers, it's kind of hard to stop.  They're so cute and quick to make! Right now I'm loving these daisies.  They're a little more three dimensional than your typical crochet flowers.  

Here's a tutorial for you so you can get started making your own crochet daisies:

Seven Petal Daisy

Materials:
Any weight yarn
Any size crochet hook
Yarn needle

Ch 2, sl st in 2nd chain from hook to form a ring.

Round 1:  Ch 1, 6 sc in ring, sl st into ch1 to join (7sc).

Round 2:  Ch 4, 1 sc into 2nd chain from hook, 1 dc in next ch, 1 hdc into last ch, sl st into next sc of round 1.

Repeat 6 more times to make 7 petals total.

Fasten off and weave in ends.

Want to print this pattern?  You can print a PDF of this pattern HERE.

P.S.  I just signed up on BlogLovin... just click the following link (or the button in my sidebar) to follow my blog there:  Follow my blog with Bloglovin

Kamis, 11 April 2013

Printing with Flowers


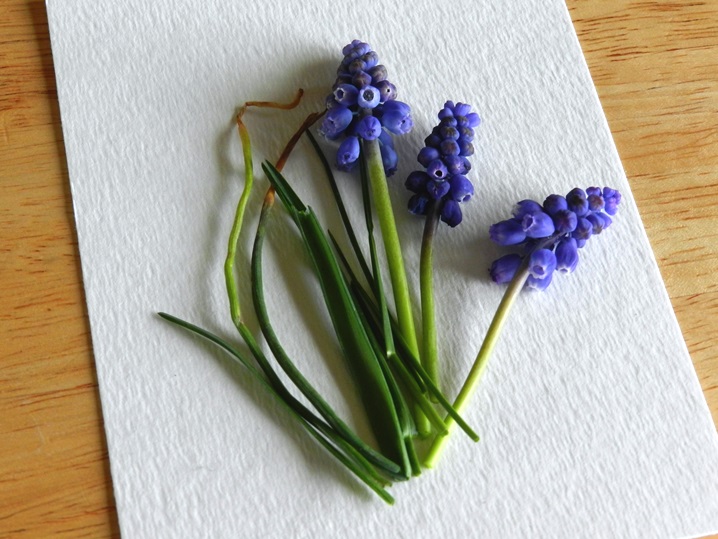
Grape Hyacinths..... so pretty, but so invasive.  These little bulb flowers were once planted in flower beds and are now all over our front lawn.

 Good thing I came up with a fun art project to put these to use!  My son had a great time smashing flowers with me :)


Materials:  
Flowers, grass, weeds- whatever kinds you like
heavy weight paper- I used 300lb watercolor paper
a sheet of regular printer paper
hammer (optional)
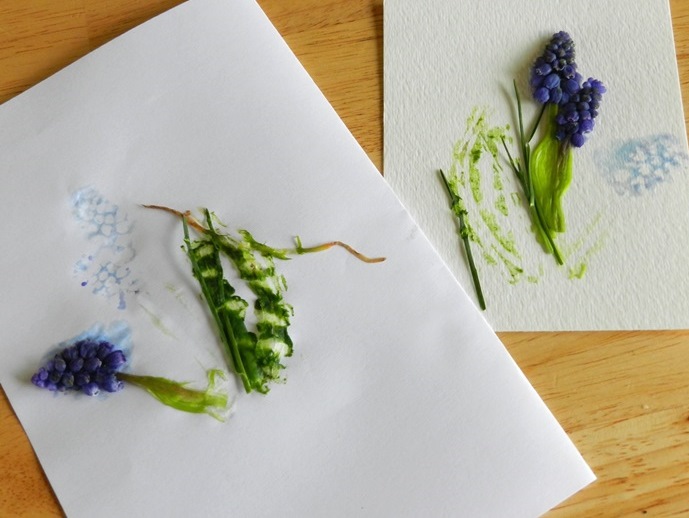
Step 1. Gather up and wash some flowers and grasses.  Just to make sure they will work on your nice paper, test them out on some scrap paper first.  I couldn't get leaves to work with this method, but try whatever you like!


Step 2:  Arrange your flowers and grasses on your nice heavy weight paper.


Step 3:  Place a regular sheet of printer paper on top of your arrangement- you can fold your printer paper in half if you like.


Step 4:  Without moving your flower arrangement, press the printer paper on top of it carefully, making sure to squish the juices and natural dyes out of the plants.  This is where you might need a hammer.  The grape hyacinths pressed easily with my fingers, but I had to pound the grasses to make any marks on the paper.


Step 5:  Lift the printer paper off and see the prints you made with the dyes of the flowers.  Remove the smashed plants and repeat the previous steps to add more to your artwork, if desired.  


Step 6: Some plant remnants may still stick to your paper, so let it dry and then scrape off the extra stuff.


Yea!  You're all done.  You can frame your artwork or make custom cards out of them!


Kamis, 21 Februari 2013

Sea Penny Bracelet Tutorial


Oh yes.... I've made something else with my little crochet sea pennies... dainty bracelets!

After trying to crochet them together in some manner and utterly failing, I settled on hot gluing them to some felt.  Ha! So simple! I wish I would have thought of that first!  I'll save you the pain...just follow my little tutorial here:

Materials:
crochet sea pennies- make enough to cover all around your wrist.  (I made mine out of a fine shiny yarn, so they look more delicate.)You can find my tutorial for them here.
felt
sew on snaps
hot glue gun


Step 1:  Measure the circumference of your wrist.  Add 1/2 to 3/4 inches to that length, depending on how tight you want your bracelet to be.  Cut a piece of felt in these dimensions:  1/2 wide x Length your wrist circumference + 1/2 to 3/4 inch.  My wrist is about 6 inches around so I cut my felt 1/2 inch wide and 6 3/4 inch long.  The width can vary here depending on how thick you want your bracelet to be and how large your crochet sea pennies are.


Step 2:  Hot glue or sew snaps onto each end, making sure to get them on the right sides so they will close nicely around your wrist.


Step 3:  Arrange the sea pennies in desired order/pattern and hot glue them to the felt strip.  Make sure to overlap the sea pennies a bit, unless you want gaps showing between them while wearing the bracelet.


Strap your bracelet on and wear it proudly cuz, hey, it's not every day you wear crochet bracelet!