Rabu, 17 Juli 2013

The Influence of Summer

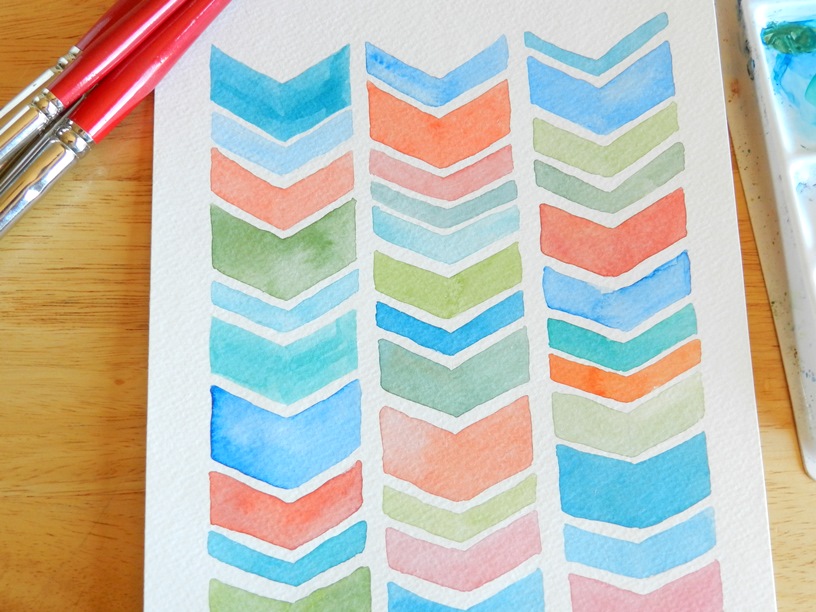
My latest watercolor illustrations........

I started out with the Chevron design in mind, but by the time I finished that, I had several other ideas.   So I kept painting..... and painting :)  I think the fact that it's summer time had a huge influence on these.  I can't keep myself away from bright colors!  

Selasa, 16 Juli 2013

Best Sites to Submit Craft Tutorials To

As a blogger who not only blogs for fun, but also a little money, I'm constantly looking for ways to get more exposure for my tutorials and projects. Aren't we all?  Lets face it, there's so much competition these days. You have to really work to get yourself out there.

Over the years I've discovered a few great sites that have helped boost my page views tremendously. Today I want to share them with you!

Here's my little list of the sites I have found to be the most helpful so far (other than the obvious Pinterest and Facebook)
Craft Gossip:  You can submit a craft in a wide variety of categories on this site.  Just fill out the form and make sure to select the right category.  I've had a lot of luck with getting stuff featured here.

Craftgawker:  This site has probably made the biggest difference in my monthly page views.  I went from 25,000 page views to over 50,000 page views the first month I submitted projects and got featured and it keeps getting better the more I projects I submit. This site is quite competitive though.  You have to have really great photos to get featured, but it's worth the effort.  

Saved by Love Creations:  This site featured my Tin Can Lanterns last year and I still get lots of page views from this site.  I have to admit though, that I didn't actually submit my tutorial for this one. The blogger found my project on her own so I don't know exactly how hard it is to get featured on there.

DIY Cozy Home:  This is one I stumbled on recently.  I've gotten over 2,000 page views from it this month!

One Pretty Thing:  One of my favorite sites.  Just send an email with your project and the link and you can usually get featured here without too much trouble.

Totally Tutorials:  This one is also pretty easy to get featured on.  You fill out a simple form.  Nothing complicated.

Dollar Store Crafts:  Another great site for low cost crafts.

30 Minute Crafts: Submit craft tutorials that take either 10, 15, or 30 minutes to make.  Cool Stuff!

Tangled Happy:  This one is for crochet projects.  I think everything I have ever submitted to this one has been featured.  Awesome!

Ravelry:  A large database of crochet and knitting patterns.  You can post your patterns for free or sell them.

All Free Sewing:  Submit sewing tutorials or patterns here and you'll get quite a few more page views.


So.......am I missing any?  What sites have helped promote your work?  Please share!

Senin, 15 Juli 2013

Photos of the Week

My hollyhocks are in full bloom......

The only problem I have with them is that they fall over so easily.  We had to stake them down.  But they are so pretty and kind of rare these days.  They are old fashioned flowers (at least around here) and that's part of the reason I like them so much :)

Kamis, 11 Juli 2013

Summer Flower Pillow and another Free Crochet Pattern

I've been experimenting with my Summer Flower Motif Pattern and came up with a larger version to decorate a pillow with......

The first part of this pattern is identical to my last flower motif, but I added two extra rounds on the end. You can download a PDF of this pattern for free here......
                          (Copyright Elise Engh 2013:  Please do not distribute this pattern as your own)

Or you can check it out below.....

Materials:                     Any yarn of choice
                                      Any size crochet hook
                                      Darning needle
Abbreviations:          ch = chain
         sl st = slip stitch
                                      sc = single crochet
                                      hdc = half double crochet
                                      dc = double crochet
         st = stitch
         sts = stitches

Round 1: ch 12, sl st into first ch to form a ring.
Round 2: ch 1, work 18 sc into ring, sl st in first sc to join.
Round 3:  ch1, sc in same st as last sl st, *ch 3, skip next sc, sc in next sc, repeat from * around 8 more times, ending in ch 3, sl st in first sc.  (9 loops for petals)
Round 4: sl st into next ch 3 space, ch 1, work (sc, hdc, dc, hdc, sc) in same space for petal.  *(sc, hdc, dc, hdc, sc) in next ch 3 space, repeat from * around 7 times (work in new color of yarn before the join, if desired), join with sl st in first sc. (9 petals)
Round 5:  *ch 6, skip next 4 sts, sc in next st (space between petals).  Repeat from * around 8 more times.   (9 petal loops)
Round 6:  sl st in next ch 6 space, ch 1, work (sc, hdc, 3dc, hdc, sc) in same space for petal.  * (sc, hdc, 3dc, hdc, sc) in next ch 6 space.  Repeat from * around 7 times,  (work in new color of yarn before the join, if desired) join with sl st in first sc. (9 petals)
Round 7:  *Ch 8, skip next 6 sts, sc in next st (space between petals).  Repeat from * around 8 more times.  (9 petal loops)
Round 8:  Sl st into next ch 8 space, ch 1, work (2sc, 2 hdc, 3 dc, 2 hdc, 2 sc) into same space for petal.  *(2 sc, 2 hdc, 3 dc, 2 hdc, 2 sc) into next ch 8 space.  Repeat from * around 7 times.  Join with sl st in first sc.  (9 petals)
Round 9:  *Ch 10, skip next 10 sts, sc in next st (space between petals), repeat from * around 8 more times.  (9 petal loops)
Round 10:  Sl st into next ch 10 space, ch 1, work (2sc, 2hdc, 8dc, 2hdc, 2sc) into same space for petal.  *(2sc, 2hdc, 8dc, 2hdc, 2sc) into next ch 10 space.  Repeat from * around 7 times.  Join with st st in first sc. (9 petals)
Fasten off and weave in ends.


Selasa, 09 Juli 2013

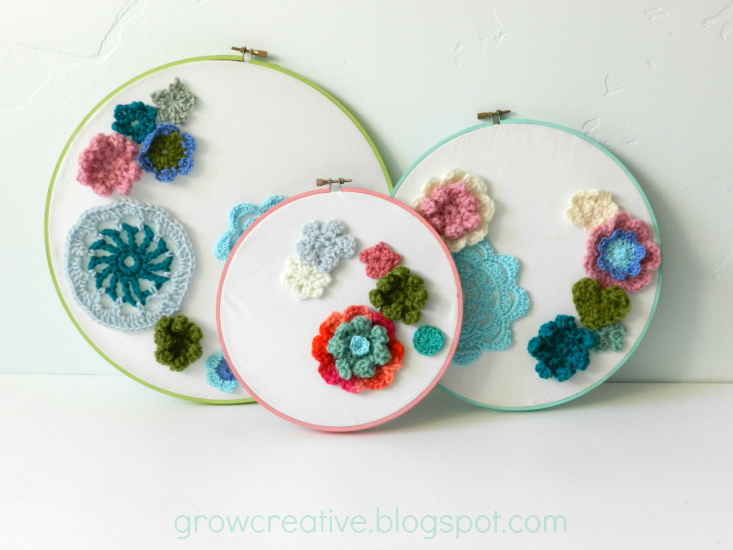
Crochet Flower Embroidery Hoops

I've discovered another use for crochet flowers...

This is such a girly way to decorate and I love it!  I have one room in the house that I can make as girly as I want and that is my art room, so that's where these crochet flower embroidery hoops will stay :)

Check out the tutorial to get started with making your own:

Materials:
Embroidery Hoops
Acrylic Craft Paint
Paint Brush
Fabric- enough to cover your embroidery hoops
Hot Glue Gun with Hot Glue Sticks
Crochet Flowers -I made my flowers from the patterns below:
Seven Petal Crochet Flower
Crochet Sea Pennies
Mini Crochet Flowers
Seven Petal Daisy
9 Petal Summer Flower Motif


Step 1:  Paint the outsides of the outer rings of the embroidery hoops with acrylic craft paint and let dry.

Step 2:  Cut out fabric to fit the embroidery hoops.  Cut the fabric large enough to fit inside the hoops and fold over the undersides.

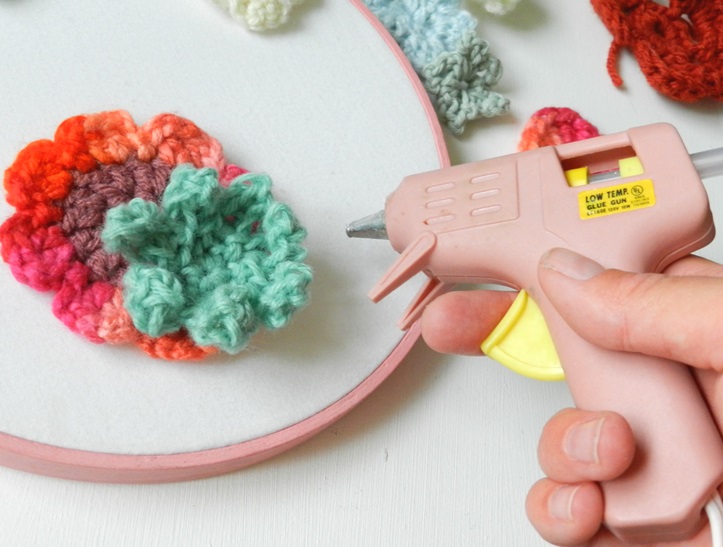
Step 3:  Place the fabric on the inner hoop and place the outer hoop on top, screwing it tight to hold.  Then hot glue the edges to the inner hoop underneath.

Step 4:  Arrange crochet flowers on the front of the hoops and hot glue them in place. Pretty Simple!

Senin, 08 Juli 2013

Photos of the Week... and a belated giveaway winner!

My photos from my busy and fun 4th of July weekend.....

After partying with family for the 4th, we actually made it to the mountains to go camping last weekend... the first time in about 6 years!  It was amazingly beautiful and green, but it dumped buckets of rain on us at night and our tent is not completely rain proof... so we got a little wet, but we survived! It felt good to get away and be in nature for a day :)

And I know I promised to announce a Craftsy Class Giveaway Winner last week, but I didn't get the winner picked out until today... so please accept my apologies.

So, our winner is........ Christina@homeofcreativity.co.za!

Congratulations!  You will be receiving a link to sign up for a free Craftsy Fine Art Class soon!

Selasa, 02 Juli 2013

Junk Mail Art Tutorial


Ever wondered what you could possible do with all the piles of junk mail you get every week? .... besides throwing it away or sending it to the recycling bin, I mean.  I always notice the bright colors and think... I should make something with this.  

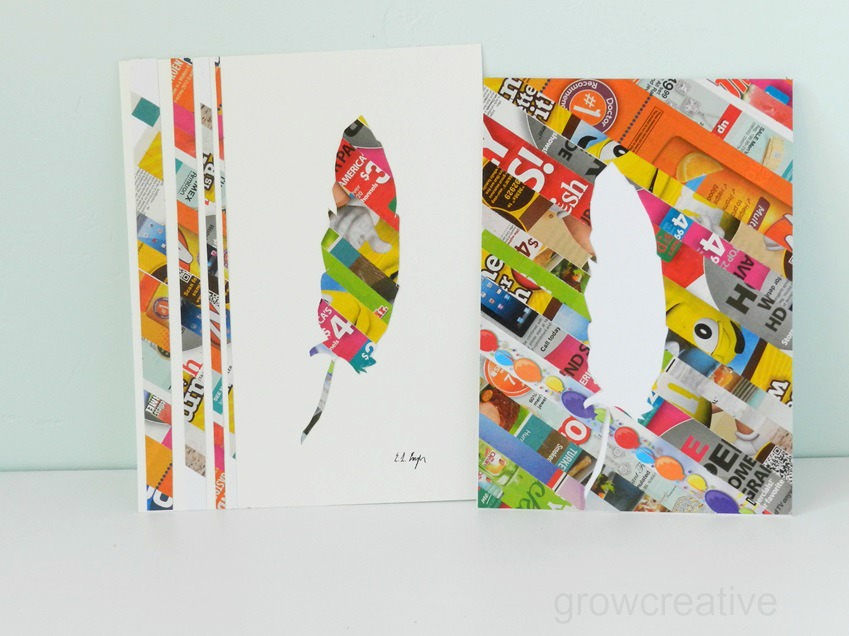
Well, I finally came up with something fun..... some Junk Mail Art!

Here's a little tutorial to get you started:

Materials:
  • Picture of a feather- You can download my feather drawing to use.
  • 8 1/2 x 11 sheet of printer paper or cardstock- to print the feather picture onto and glue the junk mail strips to.
  • 8 x 10 sheet of watercolor paper or cardstock
  • Junk mail
  • paper cutter
  • Rubber Cement or Glue Stick
  • scissors


Step 1.  Print the FEATHER PICTURE onto a sheet of computer paper or card stock.
Step 2.  With a paper cutter, cut long strips of junk mail.  Cut them long enough to cover the computer paper diagonally.


Step 3:  Glue the junk mail strips diagonally on the backside of the computer paper - make sure the feather picture is face down for this.  Cover the entire page.

 Step 4:  Trim the edges of your paper with a paper cutter.  Since the final size of the piece is 8x10 inches, trim the length to 10 inches here.

Your sheet should look like this after trimming it down.

Step 5:  Flip your sheet over and on the edge farthest away from the feather picture, slice off a few vertical strips.  I made four, each progressively smaller than the one before.  Make sure not to cut through the feather picture here.  You are going to need it for the next step.

Step 6.  Cut out the feather picture on the backside.  You should now have four junk mail strips and one feather.  Now you are ready to assemble your piece of art!

 Step 7:  Take your 8x10 sheet of watercolor paper and glue the vertical strips down to one side and the feather centered in the remaining space.  Presto!  Junk mail art!


Step 8:  (optional)  You can turn the remaining junk mail sheet into a work of art by gluing it down to another sheet of paper.  Sweet!   Two pieces of art for the price of one!