Tampilkan postingan dengan label Sewing. Tampilkan semua postingan

Rabu, 31 Juli 2013

Cabbage Curtains

Yes.... I did it! I actually sewed something that is worth sharing here......some grommet top cabbage cutrains!

I've wanted to update the curtains in the master bedroom for quite some time.  I finally found some cute fabric at Ikea... with a great price I might add :)  It wasn't until I got it home that I realized that the pattern was actually a cabbage design... haha!  I still like it anyway. The colors are great!

Every time I attempt to sew something it takes waaaaay longer than expected.  It's one of those things that I have to make many many mistakes with before I catch on.  These curtains are no exception.  I think I spent about 5 hours total because I couldn't get the right tension on my machine to get a nice even stitch with this thick upholstery fabric. Thank goodness for my handy seam ripper... haha!   At least I learned a lot about adjusting the tension. You live and learn right?

Kamis, 11 Juli 2013

Summer Flower Pillow and another Free Crochet Pattern

I've been experimenting with my Summer Flower Motif Pattern and came up with a larger version to decorate a pillow with......

The first part of this pattern is identical to my last flower motif, but I added two extra rounds on the end. You can download a PDF of this pattern for free here......
                          (Copyright Elise Engh 2013:  Please do not distribute this pattern as your own)

Or you can check it out below.....

Materials:                     Any yarn of choice
                                      Any size crochet hook
                                      Darning needle
Abbreviations:          ch = chain
         sl st = slip stitch
                                      sc = single crochet
                                      hdc = half double crochet
                                      dc = double crochet
         st = stitch
         sts = stitches

Round 1: ch 12, sl st into first ch to form a ring.
Round 2: ch 1, work 18 sc into ring, sl st in first sc to join.
Round 3:  ch1, sc in same st as last sl st, *ch 3, skip next sc, sc in next sc, repeat from * around 8 more times, ending in ch 3, sl st in first sc.  (9 loops for petals)
Round 4: sl st into next ch 3 space, ch 1, work (sc, hdc, dc, hdc, sc) in same space for petal.  *(sc, hdc, dc, hdc, sc) in next ch 3 space, repeat from * around 7 times (work in new color of yarn before the join, if desired), join with sl st in first sc. (9 petals)
Round 5:  *ch 6, skip next 4 sts, sc in next st (space between petals).  Repeat from * around 8 more times.   (9 petal loops)
Round 6:  sl st in next ch 6 space, ch 1, work (sc, hdc, 3dc, hdc, sc) in same space for petal.  * (sc, hdc, 3dc, hdc, sc) in next ch 6 space.  Repeat from * around 7 times,  (work in new color of yarn before the join, if desired) join with sl st in first sc. (9 petals)
Round 7:  *Ch 8, skip next 6 sts, sc in next st (space between petals).  Repeat from * around 8 more times.  (9 petal loops)
Round 8:  Sl st into next ch 8 space, ch 1, work (2sc, 2 hdc, 3 dc, 2 hdc, 2 sc) into same space for petal.  *(2 sc, 2 hdc, 3 dc, 2 hdc, 2 sc) into next ch 8 space.  Repeat from * around 7 times.  Join with sl st in first sc.  (9 petals)
Round 9:  *Ch 10, skip next 10 sts, sc in next st (space between petals), repeat from * around 8 more times.  (9 petal loops)
Round 10:  Sl st into next ch 10 space, ch 1, work (2sc, 2hdc, 8dc, 2hdc, 2sc) into same space for petal.  *(2sc, 2hdc, 8dc, 2hdc, 2sc) into next ch 10 space.  Repeat from * around 7 times.  Join with st st in first sc. (9 petals)
Fasten off and weave in ends.


Selasa, 07 Mei 2013

T-shirt Up-cycle: Flower Embroidery


This is the first time I have tried to embroider since I was about 10 years old.  Embroidering pillow cases with my grandma as a kid wasn't too exciting, but now I'm starting to like it.  It's way more fun when you can up-cycle a t-shirt with some pretty flowers!


I found this cute free pattern and tutorial HERE.  Mine didn't turn out as nicely as the tutorial... I'm a bit rusty.

I cut out the embroidery patch and sewed it on my once-long-sleeved-tee..... it had to be turned into a short sleeve thanks to a chain link fence that caught the sleeve and ripped it.  Oh well..... sometimes those accidents turn out to be a good thing.  Now I have something new for summer!


Jumat, 15 Februari 2013

Up-cycled Pink Cardigan


I bought this pink cardigan at a thrift store probably two years ago.  I've been meaning to do something with it from the beginning but am just finally getting around to it.  I whipped up a few crochet sea pennies and flowers and sewed them on.  They kind of look like miniature doilies to me.  I like em!


The pattern I used for the flowers come from Little Birdie Secrets and you can check out my tutorial on Crochet Sea Pennies to see how I made those.


Nothing makes me feel more girly than wearing pink and crochet at the same time :)


Rabu, 06 Februari 2013

Reverse Applique V-Day Tee


I've been wanting to hunker down and practice my sewing skills this winter.  The weather is still cold out so I have no more excuses, except for the fact that sewing can be hard on my back.  Not so fun.

For now I have to stick to quick projects, so I tried out another reverse applique on a t-shirt.  I picked an old one to do this on just in case it didn't turn out, but I was pleasantly surprised!


Now I have something fun to wear on V-day!  Hooray!

If you've never tried the reverse applique technique,  you can check out a great tutorial HERE.  

Kamis, 29 November 2012

I Made me a Yo-Yo Pillow

I'm trying to get back into sewing, so I do a little here and there.  I've actually never really gotten into sewing for real.   It's hard to learn on my own.  So for now I'm sticking with simple pillows. I can't mess them up too much :)


Since I wasn't using my yo-yo centerpiece as ... well a centerpiece... I stuck it on a pillow.  I like it much better here! And the colors fit perfectly with my living room too :)


Kamis, 05 Juli 2012

Thrifted Dress= Skirt

Hey everyone!  I hope you all had a great Independence Day yesterday!  Mine was a little different this year.  I didn't end up doing much celebrating on account of a bad migraine, but I still got to see a few fireworks :)

So, last week I finally got around to some sewing.  I've had this ugly thrifted dress in my closet for about a year now and it was time to do something with it.


I've seen so many wonderful things done with ugly thrifted dresses and I've always wanted to try my hand at it.  But, as it turns out, you need a bit more sewing experience under your belt than I have to do a complete dress make-over.  So I opted to focus on the bottom half and make a skirt.  I tried out a simple skirt tutorial from One Pearl Button.   And this is how mine turned out...


Definitely not perfect, but I think it's wearable as long as you don't look too close.. hehe!  

Kamis, 08 Maret 2012

Sewing Semi-Failure: Reversible Tote


ok, I'm not going to beat around the bush here- I struggle with sewing! I've tackled a few sewing projects in the past weeks and this little bag here is the best thing I've made so far, even though it has some issues.

It looks ok from a distance, but upon closer inspection the flaws become apparent. That's why I'm calling it a semi-failure.  I can still use it, but it's got problems.


Since I haven't had any success with using real patterns yet, I used a tutorial from Good Times Never Seem Sew Good to make this little bag.  I do so much better when I have good pictures to show me what to do!  It's an easy tutorial to follow- I only had problems because I tried to make my own variations.  I think I'll just stick to the basics from now on.


Well, I am off on a little trip to my hometown in AZ tomorrow!  I've got lots of family to visit so I won't be posting quite as often- just fyi.  I've got a post scheduled for next week and I'll try to post some photos from my trip!  Have a lovely weekend :)

Rabu, 01 Februari 2012

Reverse Applique T-shirt and a Free Pattern

Here's a look at my latest sewing project... a reverse applique T-shirt for my little guy.  The idea came from Sweet Verbana.  She has a great tutorial for the reverse applique technique.  It's pretty simple and I had fun doing it!  I even added some stitching around the edges to make it a little more interesting.


I ended up drawing my own design for the applique.  It's based on one of my son's toy tractors :) I even scanned the drawing and turned it into a PDF to share with everyone else who wants to make one!  But beware, all those curves are pretty tricky to stitch around on the sewing machine.

Just click on the link below to bring up the PDF and print away!


And here's my little guy in the one and only tractor shirt... as he plays with a part from our carpet cleaner and some string! He's quite inventive with the things he finds to play with :)


Kamis, 03 November 2011

Easy Infinity Scarf

I found a great tutorial at The Cottage Home a while ago for an infinity scarf.  It only involves cutting two long rectangles of fabric and sewing them together.  Finally- a sewing project a beginner like me can handle!


Everything went smoothly until the end.  I think the tutorial forgets to mention that you need to turn the scarf inside out again in order to sew one of the ends, or maybe I just made it weird.   But I figured it out eventually and I'm starting to get into scarves.....a first for me.

This one is perfect for a novice-scarf-wearer like me because there are only two ways to wear it- not too confusing :)


Selasa, 01 November 2011

Simple Ribbon Flower Tutorial


Brrr! The snow is here in Utah. I may be staying indoors and crafting a bit more now.  This is good and bad- I love making stuff, but geez, I miss my sunny fall weather already!

I've been experimenting with my ribbon and have come up with a way to make some super easy flowers!  Keep reading to find out how I made them. 

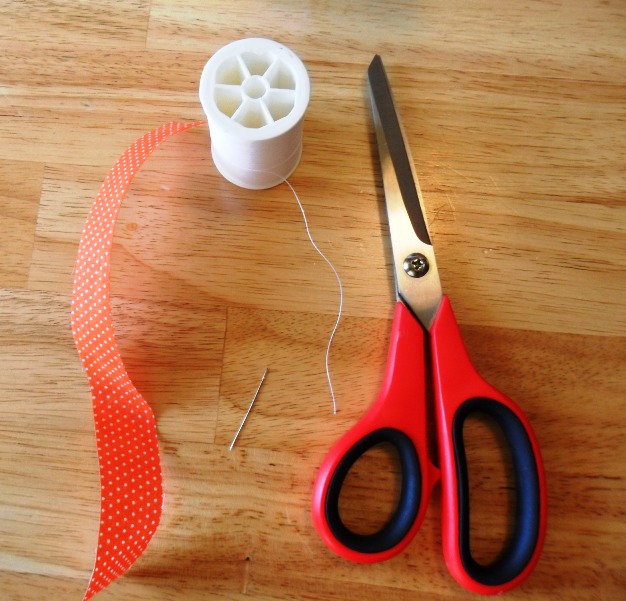
Materials: small strip of ribbon, thread, needle, and scissors


Step1.  Sew wide up and down stitches along the edge of the length of the ribbon.


Step 2.  Gently pull thread to gather ribbon.


Step 3.  Join both sides of the ribbon


Have fun and try different ribbons!  You can even layer several lengths of ribbon on top of each other to make a puffier flower.

This red lacy one here I may be using for something for Christmas!


Rabu, 12 Oktober 2011

Monster Puppets


Here they are... the monster puppets.  Not an original creation of my own, but one that I borrowed from Six Sister's Stuff.  They offer some nice free templates!  Yay!

I got a little lazy with cutting out all the patterns and free-handed a few of the accessories on my own.  I also left out the noses and hands, but oh well.  It works.

My son got a kick out of them when he saw me making them.  Taking them to church this Sunday will be the true test of their child-entertaining-effectiveness.


Selasa, 23 Agustus 2011

Shirred Shirt


Here it is... my first ever shirt sewn completely by me!  I have a shirt similar to this that I got at a yard sale and looking at it, I thought "this can't be that hard to make".  Well, coming up with it completely on my own was challenging, especially for me- a beginner.  But, it was fun coming up with the design on my own!  I'll admit I'm afraid of patterns.  It seems like I can never quite follow those instructions right.  I never know what all the terms mean.

I don't have a tutorial here for you ( I may attempt one later after I perfect the process), but I will give you the basics on how I made this.

I cut out a 42 x 22 inch piece of material and then realized that it wasn't quite wide enough to fit all around me.  So I cut out another 8 x 22 inch strip to fill in the gap. Honestly, I like this element of the shirt.  It might have been boring with just all grey material.

After sewing those two strips together, I connected the ends to make a wide tube.


Next, I sewed some shirring at the top. Shirring is a skill I acquired while trying to make a skirt, which did not turn out well, but not because of the shirring part.  Shirring itself is not so hard, but it took FOREVER to figure out how to get it to work on my Bernina.

Every tutorial I read about shirring said to wind the bobbin by hand, but that never worked for me.  I couldn't get enough tension.  I already had the tension dial turned up as high as it would go and I was using the longest stitch possible.  I wasn't going to go inside the machine and mess the the screws to tighten it up either.  I didn't want to mess up my machine for other sewing projects.  So, in the end, what worked for me was winding the bobbin with elastic thread with the machine- the exact thing everyone said not to do! Hah! I showed them! It seriously just depends on your machine.


After a few rows of shirring, I cut out two 9 x 13inch rectangles of the sleeves.  I shirred one row on each long side of each rectangle and attached them to the body of the shirt. 

Attaching the sleeves was really difficult.  I'm not sure it would be easier to attach them in the beginning instead of at the end, but I ended up hand stitching part of it.  It took forever! But, yes, now it is done and I really like how it turned out :) 


Jumat, 24 Juni 2011

yo-yo center piece


Alright, today I'm showing off a little centerpiece I've been working on over the last two weeks. It was a bit time consuming, but I've had this on my to-do list for quite some time now.  So it was time to finally make it.

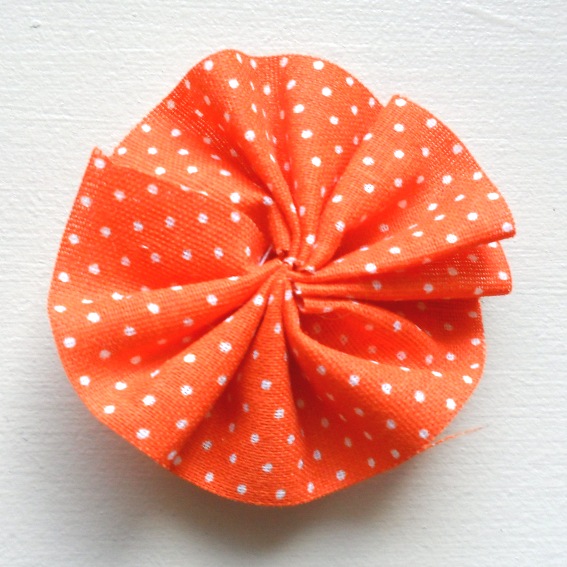
Upon visiting the history museum in my hometown last year,  I came upon an old pioneer blanket made of these cute little yo-yo's.  I loved the look of it, so when I got back to Utah, I sat down and figured out how to make them.  I even wrote a tutorial in which, I unknowingly called them "pinwheels".   I had no idea they were called "yo-yo's" until about a month ago.

Apparently, some one out there makes a yo-yo maker.  I'm not sure how helpful it is because these are seriously so easy to make without anything but fabric, thread, and a needle.   Check out my tutorial here.


Selasa, 01 Februari 2011

My First Bag

I just realized that this is my 100th post! Woo whoo!  I feel like I should give something away, but I'm kinda bogged down with health stuff for now.   I'm going into the outpatient clinic again this Friday for another set of shots- this time in my back.  I hope this works out because I absolutely HATE hospitals! If you've ever set foot in one, I'm sure you know what I mean :)

Anyway, I finished, or "fixed" my bag that I started last week.  It really looks nothing like it is supposed to.  I'm new to sewing and I could not figure out the instructions for the life of me.  So I ended up improvising so that it would at least look like a bag in the end.  If you want to give this one a try I found the instructions and free pattern at http://lulalouise.blogspot.com/2007/08/blogiversary.html.  May you have better luck with this than I did!

P.S.  If I ever do figure out the right way to make this bag, I will post my own tutorial for all of us beginners out there.


If you're wondering where I got this funky corduroy material, I will tell you.  Have you ever been to the D.I.  (thrift store) and seen those bags of random fabrics for like $3?  Yep, that's where I got it.  I'm really not afraid of thrift stores :)

Senin, 10 Januari 2011

My first sewing project

 My wonderful loving mother gave me a sewing machine for Christmas this year and I was a little scared to use it at first.  I have used a sewing machine before, but not since my high school days.  So, here is my first sewing project with my new machine!  Its more fun than I remembered!


I opted to start out with the most simple thing you could sew, a pillow.  I hope to advance to sewing skirts one day, but that may be a while :)

Rabu, 03 November 2010

Flower Hair Clips


I started making these little flowers last month.  Visit my Fabric Flower Post to learn more.  I had some little leftovers hanging out in my sewing box and thought they would look good on some hair clips!  I love how they look!

Jumat, 08 Oktober 2010

More Flower Experiments


I saw some headbands with these cute little flowers on them at a store and then I found out how to make them at blissbloomblog and then... I had to try it!  Way easy to make! 

I used the flowers to make a headband of my own, plus a few other things.  Here's what I came up with:


This one is a little different.  I used the flower rolls in I wrote about in a previous post.


Now if only I had a little girl to wear some of these!  Oh well, someday....