Rabu, 31 Agustus 2011

Stenciled Animal Cards


Here are a few animals cards I made using watercolors and stencils.   I found this set of stencils at the dollar store and have been experimenting with them.  Brushing watercolors over them creates a really cool effect.

I added some patterned packing tape from Michaels for a border for this rhino card.   Patterned packing tape and stencils are some of the coolest inventions ever!


Kamis, 25 Agustus 2011

More Watercolor Fruit


I just love that pears and tomatoes are in season right now!  Not that I particularly love to eat them, ( they aren't too bad, but I have to eat them with something else, not alone) but I love painting them!


Selasa, 23 Agustus 2011

Shirred Shirt


Here it is... my first ever shirt sewn completely by me!  I have a shirt similar to this that I got at a yard sale and looking at it, I thought "this can't be that hard to make".  Well, coming up with it completely on my own was challenging, especially for me- a beginner.  But, it was fun coming up with the design on my own!  I'll admit I'm afraid of patterns.  It seems like I can never quite follow those instructions right.  I never know what all the terms mean.

I don't have a tutorial here for you ( I may attempt one later after I perfect the process), but I will give you the basics on how I made this.

I cut out a 42 x 22 inch piece of material and then realized that it wasn't quite wide enough to fit all around me.  So I cut out another 8 x 22 inch strip to fill in the gap. Honestly, I like this element of the shirt.  It might have been boring with just all grey material.

After sewing those two strips together, I connected the ends to make a wide tube.


Next, I sewed some shirring at the top. Shirring is a skill I acquired while trying to make a skirt, which did not turn out well, but not because of the shirring part.  Shirring itself is not so hard, but it took FOREVER to figure out how to get it to work on my Bernina.

Every tutorial I read about shirring said to wind the bobbin by hand, but that never worked for me.  I couldn't get enough tension.  I already had the tension dial turned up as high as it would go and I was using the longest stitch possible.  I wasn't going to go inside the machine and mess the the screws to tighten it up either.  I didn't want to mess up my machine for other sewing projects.  So, in the end, what worked for me was winding the bobbin with elastic thread with the machine- the exact thing everyone said not to do! Hah! I showed them! It seriously just depends on your machine.


After a few rows of shirring, I cut out two 9 x 13inch rectangles of the sleeves.  I shirred one row on each long side of each rectangle and attached them to the body of the shirt. 

Attaching the sleeves was really difficult.  I'm not sure it would be easier to attach them in the beginning instead of at the end, but I ended up hand stitching part of it.  It took forever! But, yes, now it is done and I really like how it turned out :) 


Senin, 22 Agustus 2011

Photo of the Week


It's that time of year again..... the sunflowers are appearing everywhere!  Every time they come out I can't stop taking pictures of them.  They make me happy :)

Jumat, 19 Agustus 2011


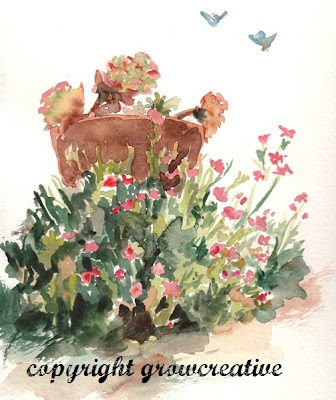
Yep, I'm back to painting flowers.  I did the cars and trucks thing for a while, but in the end, it always comes back to flowers.  I just love them! 

P.S. I sold one of my pears paintings in my etsy shop this week! Ya! My very first sale! That is a nice feeling :)

P.P.S I know I haven't been posting much crafty stuff lately, just artsy stuff.  I'm trying to get my shop going, but I've got a sewing project in the works.  I can't wait to share that one, if it turns out ; )


Rabu, 17 Agustus 2011

A Look at my Sketchbook

So, I've been spending lots of time in doctor's offices lately, I won't go into detail about my health problems here, but I will share what I do while waiting in the doctor's office ( besides sweat)- I draw!  

Yes, there are a limited amount of interesting things to draw in a doctor's office, but, it keeps me occupied and keeps me from getting too nervous.  Doctor's always make me anxious- I never know what they are going to say.  So, I make it a habit to bring a little sketchbook along with me.  

Since my problem is with my back, I sometimes get lucky and have a cool diagram poster in the doctor's office.  It gives me a chance to brush up on my figure drawing and learn what my muscles and vertebrae actually look like.  The human body is fascinating!  


Then, other times I am left to sketch the mundane sink or chair.  But, no matter the subject, it's always good to get some sketching in :)


Senin, 15 Agustus 2011

Kamis, 11 Agustus 2011

Another one for the boys!


Here's another watercolor for the boys! I don't think I will ever stop wanting to paint flowers- I'm such a girl :), but I'm having fun venturing into boy land with tractors and cars!  Its a whole new exciting thing and I'm seriously thinking of making prints of this one to sell in my etsy shop.  I just have to figure out how and where to make prints.

Yep, there is a huge learning curve when it comes to trying to sell art.  I haven't sold anything yet- the competition on etsy is fierce-  but I'm just getting started.  Thanks for all the sweet and encouraging comments on my work.  It really keeps me going!

Selasa, 09 Agustus 2011

Watercolor Cars


I worked on a few "experiments" over the weekend.  I call them "experiments" because I have never ever attempted to draw cars, let alone paint them.  I'm always painting girly things like flowers, so this is me branching out.   Since Porter likes these so much, I may attempt some tractors next..... we'll see!


Rabu, 03 Agustus 2011

Abstract Watercolor Tutorial

Today I want to share a cool watercolor trick that will help you to make an abstract watercolor artwork for yourself!  This is so simple and it doesn't any drawing/ artistic skills, except for choosing choosing colors.


What you need: Watercolor paper
                             Watercolors paints and brush -a cheap $1 set from walmart will do
                             Card board or some sort of hard surface to tape your paper to
                             Masking Tape
                             Rubber Cement
                             Hair Dryer
                             Pen

Step 1: Tape your watercolor paper to your card board.  Make sure you have half of the thickness of the tape covering your paper and half of it sticking to the board.

Tip : To help the tape come off easier when your painting is done, try this little trick.  Before you stick your tape to the board, stick it to the carpet or your pants and then quickly pull if off.  The tape will pick up little fibers making it easier to get it off your paper without ripping your paper.  Cool huh?


Step 2:  Choose your color palette.  A little planning in the beginning really helps the outcome of the painting.  I find it works well to stick to no more than 3 colors. An easy way to choose colors is to pick colors that are next to each other on the color wheel.  So you could do:  yellow, green, and blue OR red, purple, and blue.....something of that sort.  You get the picture.

Step 3:  Splat or drip random globs of rubber cement on your paper and let it dry.  This is where the blow dryer comes in handy.  You don't have to use it, but it makes the process go A LOT faster.  Don't rub  off the rubber cement until the very end of this project.


Step 4: Paint with watercolors on the paper going over the globs of dried rubber cement.  The placement of the colors doesn't really matter.  Just go with the flow.   Let the paint dry or use a blow dryer.


Step 5: Repeat step 3 by adding more globs of rubber cement and letting it dry.  Then repeat another layer of watercolors over it.  Do as many layers of rubber cement and watercolors as you like as long as you allow each layer to dry before applying the next.  I do 4 or 5 layers and that is enough for me.


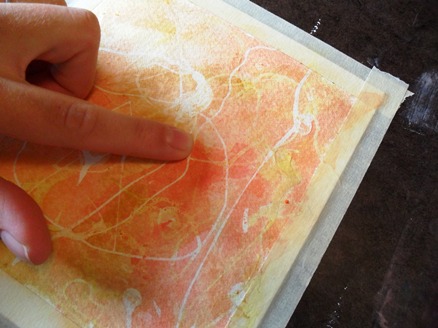
Step 6: When everything is dry you can take the rubber cement off by gently rubbing your finger over it.  Once the glue is all off, you will see the cool patterns it leaves!


Step 7:  Gently pull the masking tape off your paper.  Careful though, the paper tends to rip and stick to the tape!  This is why you need to use the tip I gave in step 1!  Once the tape is all off, you will have a nice border around your painting.


Step 8:  Optional- With a pen, outline the designs you see left from the rubber cement. You don't have to do this if you like your painting without the pen on it, but I think the ink brings out the design and makes it look better.


Yay! You're all done!  You created an abstract work of art you can be proud of!


Senin, 01 Agustus 2011

My Etsy Shop is Open!

Ok guys.  I did it!  I went for it and opened up my very own Etsy shop.  This is totally an experiment, but since it only costs $.20 to list an item, I think I can handle the risk.

I have 7 watercolor paintings listed and hope to make some more this week to build up my shop.

I'm still not sure how to price everything- if it's reasonable- if anyone will buy it-etc..  So go check it out and let me know what you think!  I would love some feedback :)  Just click on the thumbnail below or in my sidebar.